Here we go, another dessert. It's just too hard to resist! Our sweet tooth is extra sweet this week. This is our take on the Red Velvet Cupcake minus the red. Instead, it's a White Velvet Cupcake. Still just as decadent as the red velvet cupcake but a little more reserved and not so bold.

This recipe doesn't take too much effort- because it can't be difficult for us.
White Velvet Cupcakes
Makes 28 cupcakes
Dry Ingredients
Directions
Let's get started! Preheat your oven to 325 degrees and line your cupcake trays with liners and set aside.

Begin to sift the flour over a large mixing bowl.


This recipe doesn't take too much effort- because it can't be difficult for us.
White Velvet Cupcakes
Makes 28 cupcakes
Dry Ingredients
- 3 cups of flour, sifted
- 1 1/2 tablespoons of cocoa powder
- 2 cups of sugar
- 1 teaspoon of baking powder
- 2 teaspoons of baking soda
- 1 teaspoon of salt
- 2 eggs, make sure they are room temperature
- 1 cup of full fat buttermilk, also at room temperature
- 1/2 cup of canola oil
- 2 teaspoons vanilla extract
- 1/2 cup of sour cream
- 2 teaspoons of white vinegar
- 1/2 cup of hot water
Directions
Let's get started! Preheat your oven to 325 degrees and line your cupcake trays with liners and set aside.

Begin to sift the flour over a large mixing bowl.

Add the remaining dry ingredients to the bowl: cocoa powder, sugar, baking powder, baking soda, and salt.

Begin mixing on low speed until all ingredients are combined.

Grab a medium mixing bowl and combine all of the wet ingredients: eggs, buttermilk, canola oil, vanilla extract, water, sour cream, and white vinegar. Lightly whisk the wet ingredients together, then dump into the large mixing bowl with the dry ingredients.
Mix on low speed and work your way up gradually to medium speed and then mix for 1-2 minutes. Remember to scrape the sides of the bowl as needed (maybe 2 times) to get any clinging flour off of the sides of the bowl.

Now that everything is mixed together, pour the batter into a large measuring cup that has a spout so you can pour the batter much easier to avoid spilling. Pour into the cupcake liners about 2/3 full.

Bake for 23-26 minutes. Insert a toothpick into the center of a cupcake and once it comes out clean, the cupcakes are ready to come out.

Let the cupcakes cool on a wire rack and begin making the cream cheese frosting.
Cream Cheese Frosting
Frosts up to 28 cupcakes
Ingredients
- 1 cup of unsalted butter at room temperature
- 8 oz of cream cheese at room temperature
- 4 cups of powdered sugar
- 2 teaspoons of vanilla extract
Add the unsalted butter and the cream cheese to a mixing bowl. Make sure both the cream cheese and butter are at room temperature or you will have a harder time trying to mix them together. Mix on medium speed until mixed thoroughly. Turn the mixer off, or you will have a powdered face, and add the powdered sugar slowly, about 1 cup at a time. Once all of the powdered sugar is added and mixed well, add the vanilla extract and mix again until combined.


--------------------------------------------------------------------------------------------------------------------------Let's get to frosting these delicious cupcakes!
Your cupcakes should be completely cool.

Fill up a pastry bag, with the tip of your choice, about halfway and twist the pastry bag closed. Avoid putting too much frosting in the pastry bag because you can make a really big mess if you do- just fill it up halfway, this is always best.
To begin frosting, start in the middle of your cupcake and work your way out. Decorate with sprinkles or just keep them simple.

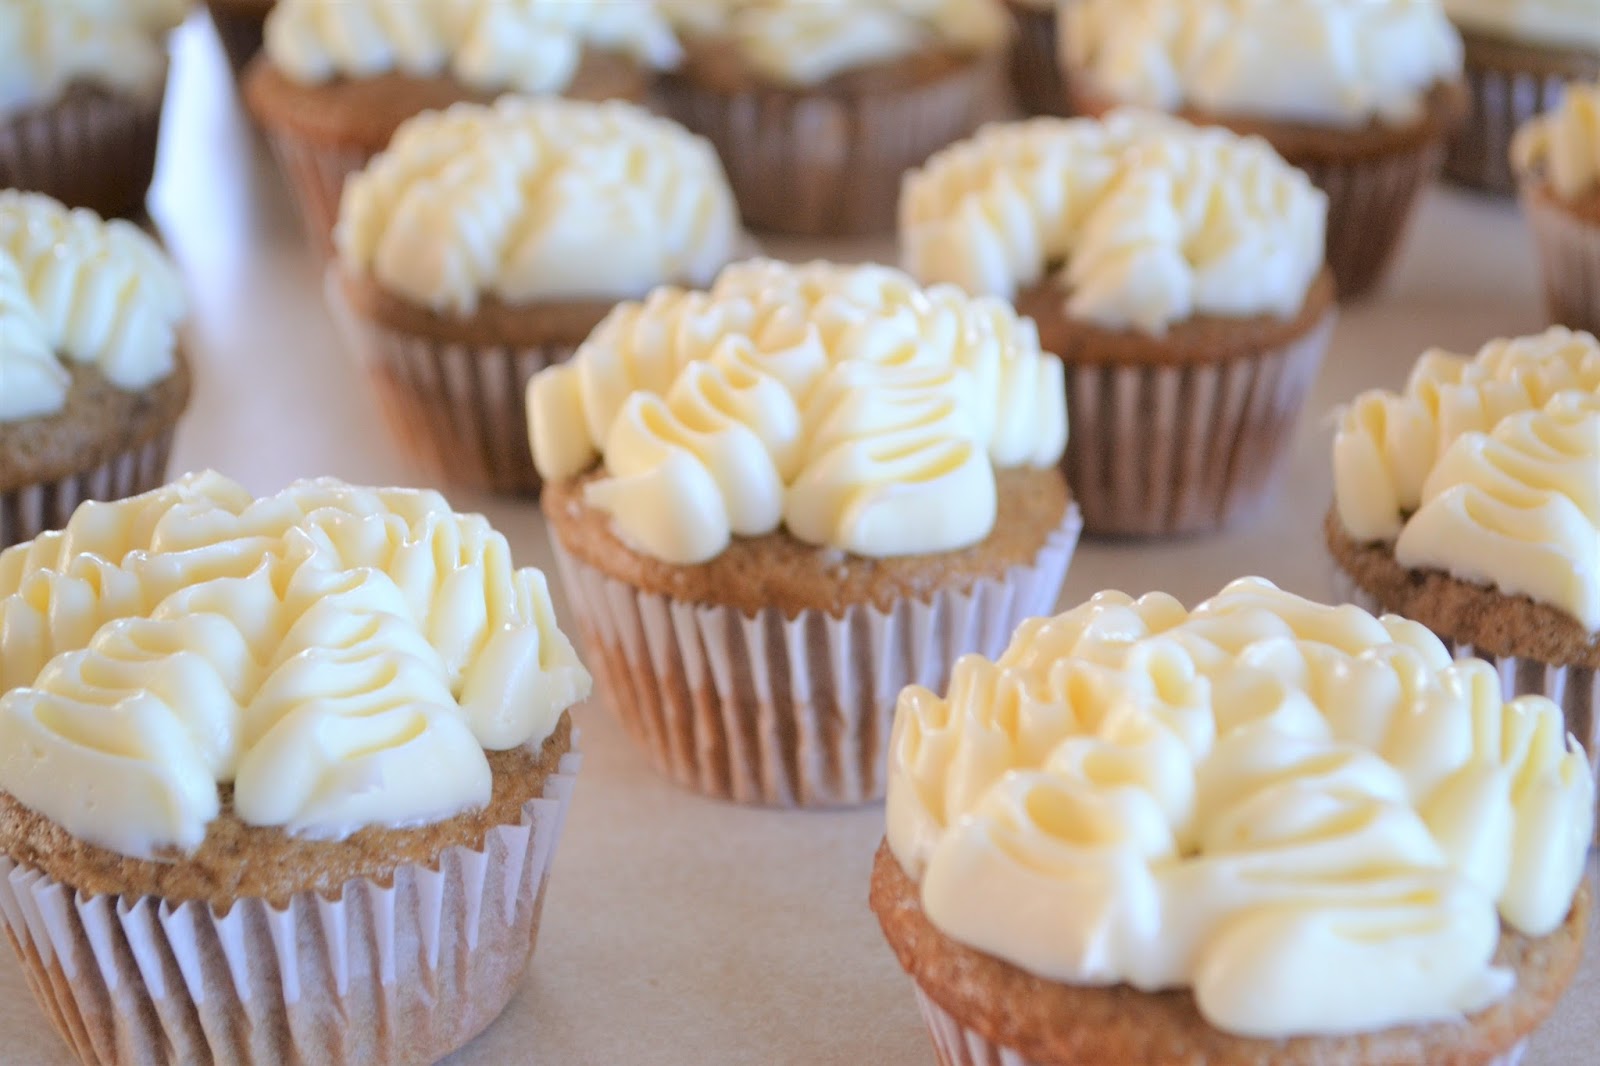

Eat them up right away. They are delicious! We hope you enjoy.
Let us know how they turn out.
Nicole & Ashylee
Comments
Post a Comment